Running a Linux server on the public internet means it will be targeted — constantly. Bots scan for open ports and weak credentials within minutes of a server going live. This guide covers the essential hardening steps to significantly reduce your attack surface and keep your Linux server as secure as possible.
Prerequisites
- A Linux server (e.g. Ubuntu, Debian, Fedora)
- Root or sudo access
- Basic familiarity with the terminal
SELECT YOUR PACKAGE MANAGER
Keep the System Updated
The single most impactful thing you can do is keep packages up to date. Most breaches exploit known vulnerabilities that already have patches available.
apt update && apt upgrade -y
Enable Automatic Security Updates
apt install unattended-upgrades -y
dpkg-reconfigure --priority=low unattended-upgrades
This installs security patches automatically without requiring manual intervention. I also recommend rebooting your server once a week to apply kernel updates. You can automate this with a cron job:
crontab -e
0 4 * * 1 /usr/sbin/reboot
This reboots the server every Monday at 04:00 AM.
Secure SSH Access
SSH is the primary entry point for remote management — and the primary target for brute-force attacks.
Disable Root Login And Create A New Sudo User
Never allow direct root login over SSH. Always use a regular user with sudo.
If you haven't already, create a dedicated admin user:
adduser username
usermod -aG sudo username
Switch to that user and verify sudo works before you close your root session.
Change default port
Changing the default port from 22 to something else reduces automated scan noise significantly.
Edit /etc/ssh/sshd_config:
PermitRootLogin no
PasswordAuthentication no
PubkeyAuthentication yes
AuthorizedKeysFile .ssh/authorized_keys
Port 222
Setting PasswordAuthentication no prevents all users from logging in with a password — only key-based authentication is accepted, which is significantly more secure.
Use SSH Keys Instead of Passwords
Generate a key pair on your local machine:
ssh-keygen -t ed25519 -C "your-email@example.com"
Copy the public key to the server:
ssh-copy-id -i ~/.ssh/key-name.pub username@your-server-ip
Restart SSH after any config change:
systemctl restart sshd
Edit ~/.ssh/config on your local machine to set up a quick alias for connecting to your server:
Host ServerName
Hostname ServerIPAddress
Port 222
User username
IdentityFile ~/.ssh/server-private-key
Now you can connect to your server like this: ssh ServerName
Configure a Firewall
apt install ufw -y

# Deny all incoming by default
ufw default deny incoming
ufw default allow outgoing

# Allow SSH on the custom port
ufw allow 222/tcp

# Allow web traffic if needed
ufw allow 80/tcp
ufw allow 443/tcp
ufw allow 443/udp # important for http protocol version 3

ufw enable
ufw status verbose
Install fail2ban
fail2ban monitors log files and automatically bans IPs that show signs of brute-force attacks.
apt install fail2ban -y
Edit /etc/fail2ban/jail.local and create the following config:
[sshd]
enabled  = true
port     = 222
maxretry = 2
bantime  = 30d
findtime = 24h
These settings ban any IP after 2 failed login attempts within 24 hours, for 30 days. This is an aggressive configuration, but with public key authentication you should never need more than one attempt anyway.
Start and enable fail2ban:
systemctl enable --now fail2ban
fail2ban-client status sshd
Disable Unused Services
Every running service is a potential attack surface. List what's running:
systemctl list-units --type=service --state=running
Disable anything you don't need, for example:
systemctl disable --now avahi-daemon # allowing devices on a local network to automatically discover each other
systemctl disable --now cups # printer service
Harden Kernel Parameters with sysctl
Add the following to /etc/sysctl.d/99-hardening.conf:
# Prevent IP spoofing
net.ipv4.conf.all.rp_filter = 1
net.ipv4.conf.default.rp_filter = 1

# Ignore ICMP redirects
net.ipv4.conf.all.accept_redirects = 0
net.ipv6.conf.all.accept_redirects = 0

# Ignore broadcast pings
net.ipv4.icmp_echo_ignore_broadcasts = 1

# Disable SYN flood attacks
net.ipv4.tcp_syncookies = 1
Apply the changes:
sysctl --system
Security is not a one-time task. Revisit your server configuration regularly, monitor your logs, and stay informed about newly discovered vulnerabilities in the software you run.
Bonus – Monitoring and Alerting
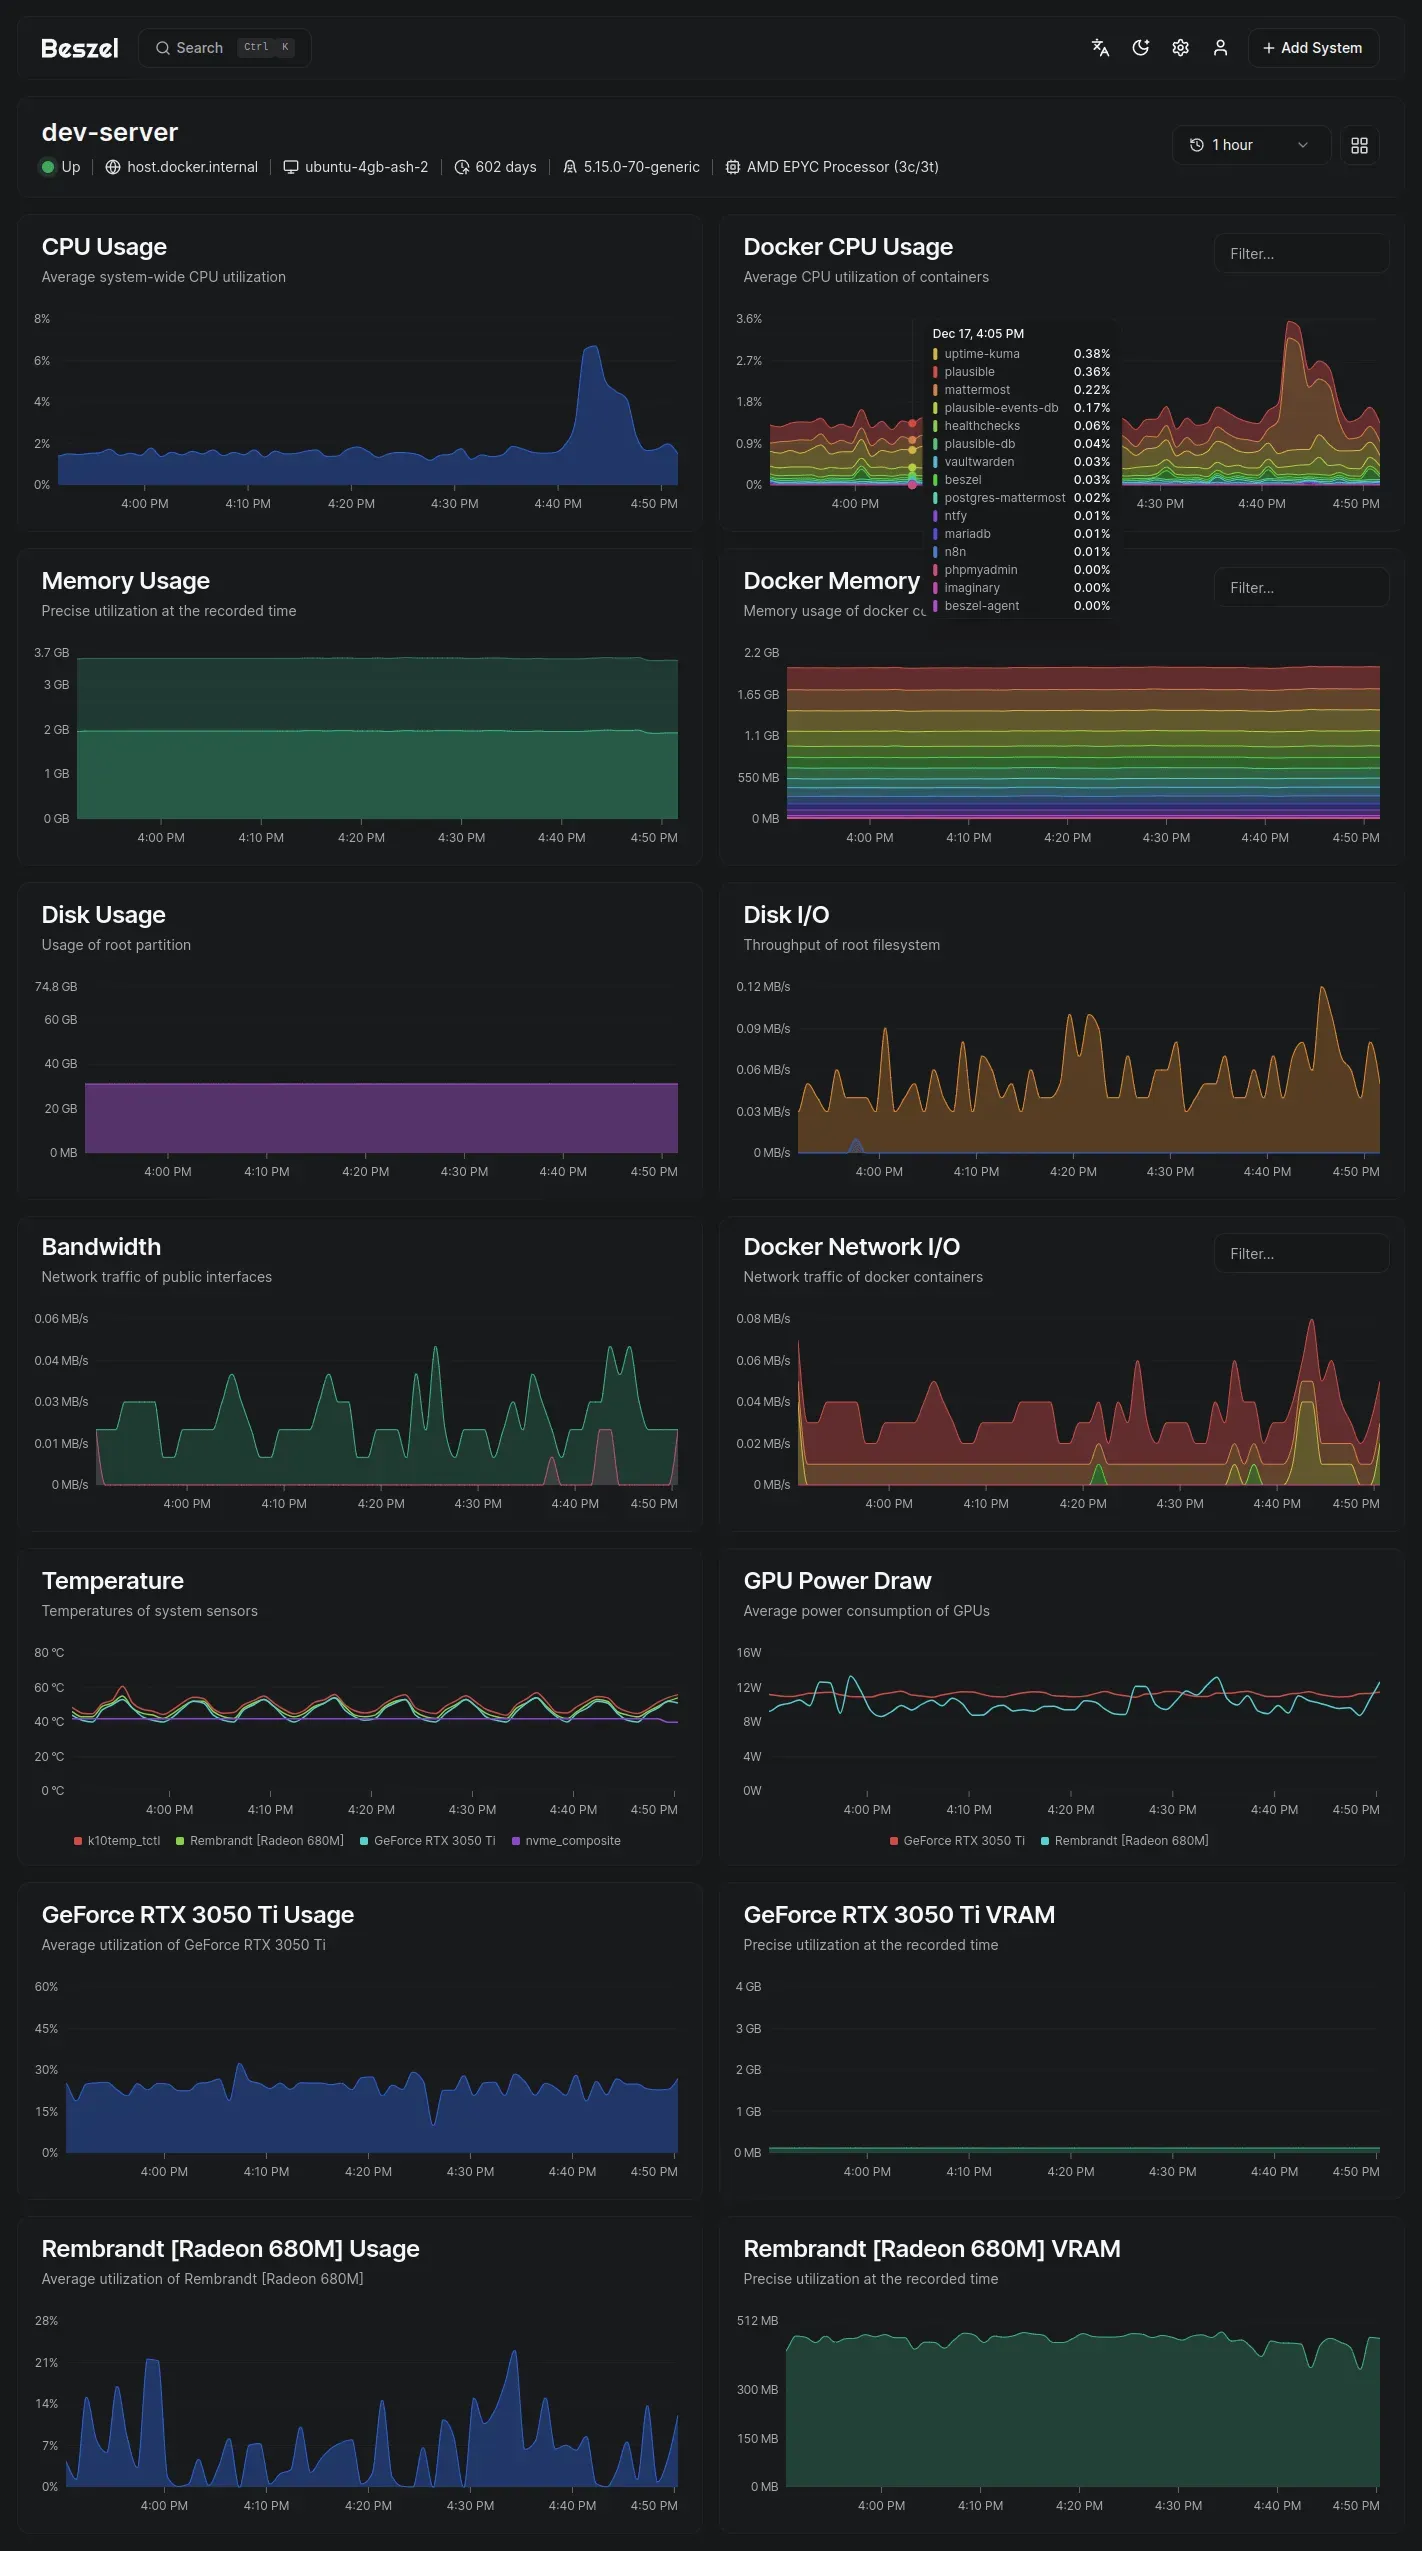
One bonus tip: install a monitoring tool like Beszel.
It's clean, well-designed, and I was immediately impressed by how easy it is to set up.
You can monitor your server's performance and configure alerts for when something looks off.
I've set up alerts via ntfy, so I get a push notification directly on my iPhone whenever something like high CPU usage persists for an extended period or similar issues occur.
Beszel also lets you monitor the status and performance of your Docker containers.
It runs on all major platforms — Windows, Linux, and macOS. If you want to step up your monitoring game, give it a shot.
I'd wholeheartedly recommend it to any fellow IT professional. Here's a screenshot of the UI:
Comments
No comments yet — be the first!