
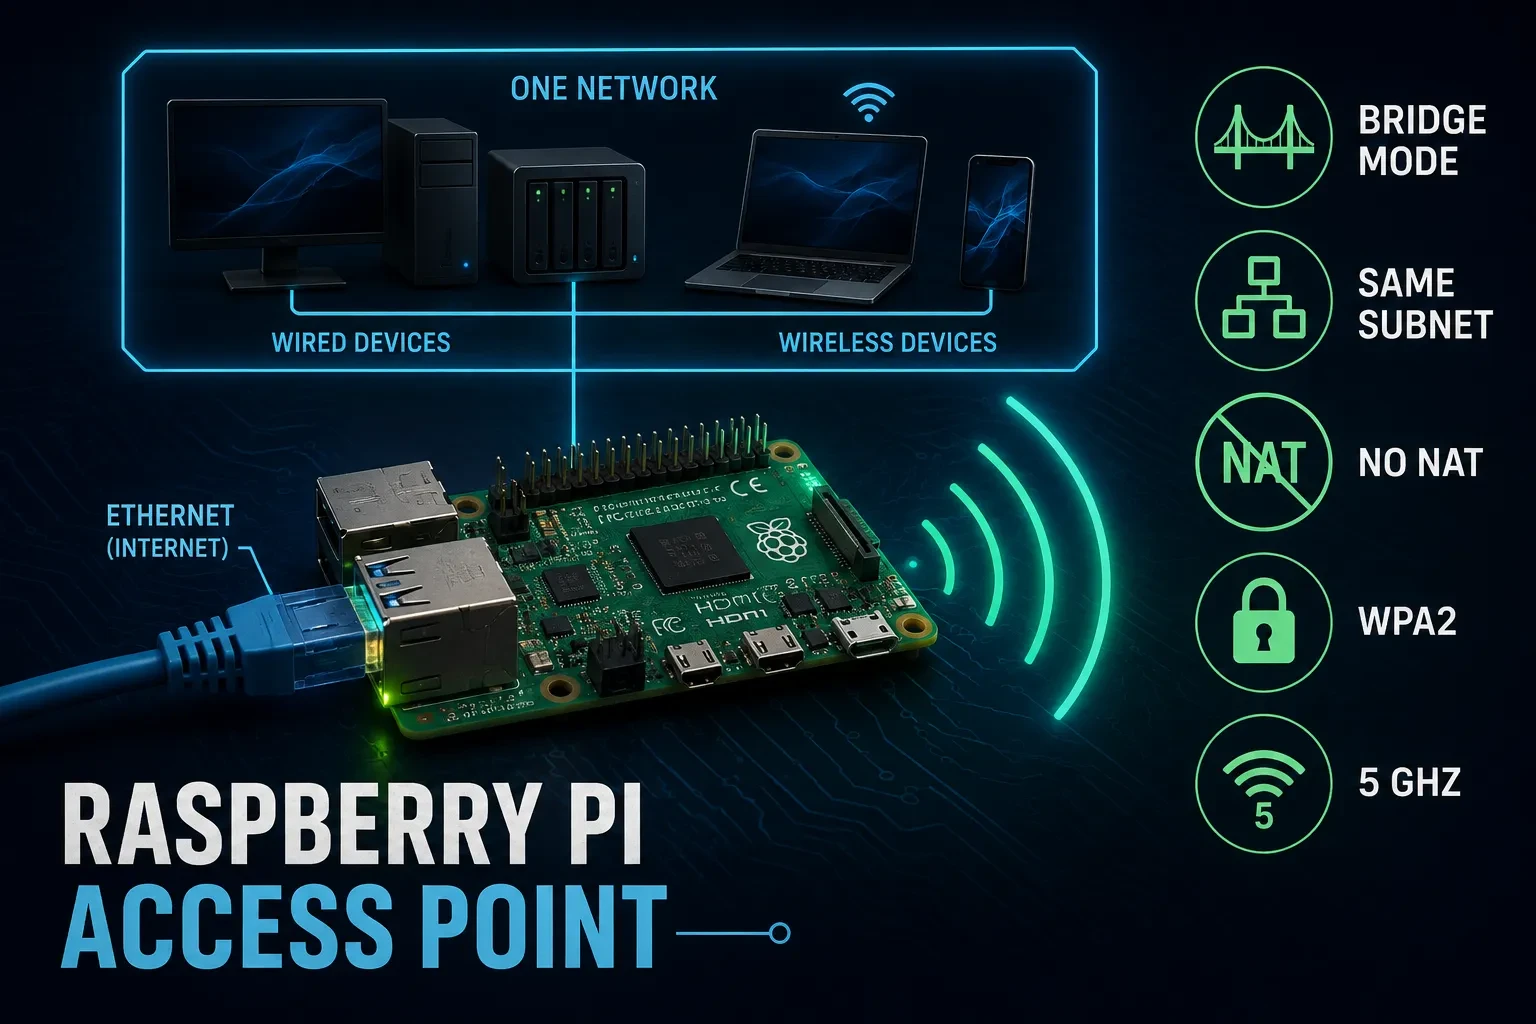
A Raspberry Pi 3, 4, or 5 can broadcast a Wi-Fi network that lives on the same subnet as your LAN — no second subnet, no NAT, no special-case rules.
The difference from a typical "hotspot": with a bridged access point, the wired and wireless sides share one broadcast domain. For your devices, that means:
- DHCP still comes from your existing router or DHCP server
- every device can reach every other device, wired or wireless
- mDNS/Bonjour (
.local) works across both sides - no port forwarding, no double address translation
A NAT hotspot can do none of this, because it creates a network of its own. For the same reason, macOS Internet Sharing is a poor long-term solution — it always creates a second subnet with NAT in front of it.
Prerequisites
| Hardware | Raspberry Pi 3, 4, or 5. The Pi 4 and 5 support 5 GHz; the Pi 3 is 2.4 GHz only. |
| Operating system | Raspberry Pi OS with NetworkManager (Bookworm or newer) |
| Connection | The Pi is connected to your router by cable |
| Access | SSH access to the Pi |
Read this before you start. This guide changes the Pi's network configuration. If something goes wrong, the Pi becomes unreachable over the network — and the configuration persists across reboots.
Make sure you have a second way onto the device beforehand: a micro-HDMI cable and a keyboard. Alternatively, you can mount the SD card on another computer and undo the configuration in /etc/NetworkManager/system-connections/.
In practice the switch usually goes through without trouble — but going in without a way back is a risk you should be aware of.
Step 1: Your network values
Fill in your own values here. You need three pieces of information:
| What | Example | Yours |
|---|---|---|
| Pi's IP address | 192.168.1.50/24 | |
| Gateway (your router) | 192.168.1.1 | |
| DNS server | 192.168.1.1 or 1.1.1.1 |
Choosing the IP: The Pi gets a static address. Pick one outside your router's DHCP range — otherwise the router will eventually hand it to another device. You'll find the range in your router's web interface under the DHCP settings.
About DNS: If you run your own DNS server (Pi-hole, AdGuard Home, Unbound), enter its address — which is the Pi's own IP, 192.168.1.50 in this example. Otherwise use your router's address or a public resolver such as 1.1.1.1.
These remaining values are the same for everyone:
| What | Value |
|---|---|
| Bridge name | br0 (this is what carries the Pi's IP) |
| Interfaces in the bridge | Ethernet + Wi-Fi |
| Band | 5 GHz, channel 36 |
| Encryption | WPA2 (CCMP) |
Why WPA2 and not WPA3: The Broadcom chip in the Raspberry Pi does not reliably support SAE in AP mode. With WPA3 configured, the network simply refuses to start.
Why channel 36: DFS channels from 52 upward require radar detection, which the brcmfmac driver does not provide in AP mode. That leaves channels 36, 40, 44, and 48.
Step 2: Check the hardware
Set the country code. Without one, the radio refuses to operate as an access point — on 5 GHz without exception.
sudo raspi-config
→ Localisation Options → WLAN Country → select your country → reboot.
Verify it took effect. It must not report country 00:
iw reg get
Confirm AP mode is supported. * AP has to appear in the list:
iw list | grep -A 12 "Supported interface modes"
Check your model. The Pi 4 and Pi 5 support 5 GHz. If you have a Pi 3, also follow the "Raspberry Pi 3 adjustment" section in Step 3 — that keeps you on 2.4 GHz:
cat /proc/device-tree/model
Find your interface names. eth0 (wired) and wlan0 (wireless) are the usual names. If yours differ — end0, for example — adjust the script accordingly:
ip -br link
Find the name of your existing connection. By default it is Wired connection 1. If yours differs, substitute your name everywhere below:
nmcli connection show
Step 3: The setup script
The entire change goes into a script, and there is a good reason for that: the moment the Ethernet interface joins the bridge, your SSH connection drops briefly. If you typed the commands one by one, the remaining ones would never run — leaving the Pi half configured.
Adjust before running: IP address, gateway, DNS, SSID, and Wi-Fi password.
sudo tee /usr/local/bin/net-apply.sh >/dev/null <<'EOF'
#!/bin/sh
set -e

# ---- Adjust these ----
PI_IP="192.168.1.50/24"
GATEWAY="192.168.1.1"
DNS="192.168.1.1"
WIFI_SSID="MyWiFi"
WIFI_PASS="change-me"
ETH_IF="eth0"
WLAN_IF="wlan0"
OLD_CON="Wired connection 1"
# ----------------------

# Bridge carrying the Pi's static IP
nmcli connection add type bridge con-name br0 ifname br0 \
  ipv4.method manual \
  ipv4.addresses "$PI_IP" \
  ipv4.gateway "$GATEWAY" \
  ipv4.dns "$DNS" \
  ipv6.method disabled \
  bridge.stp no

# Add Ethernet to the bridge
nmcli connection add type ethernet con-name br0-eth0 ifname "$ETH_IF" master br0

# Add Wi-Fi as an access point to the bridge: 5 GHz, channel 36, WPA2 with CCMP
nmcli connection add type wifi con-name br0-ap ifname "$WLAN_IF" master br0 \
  ssid "$WIFI_SSID" \
  802-11-wireless.mode ap \
  802-11-wireless.band a \
  802-11-wireless.channel 36 \
  802-11-wireless.powersave 2 \
  wifi-sec.key-mgmt wpa-psk \
  wifi-sec.proto rsn \
  wifi-sec.pairwise ccmp \
  wifi-sec.group ccmp \
  wifi-sec.pmf 2 \
  wifi-sec.psk "$WIFI_PASS"

# Retire the old wired connection
nmcli connection modify "$OLD_CON" connection.autoconnect no
nmcli connection down "$OLD_CON" || true

# Bring everything up
nmcli connection up br0
nmcli connection up br0-eth0
nmcli connection up br0-ap
EOF
sudo chmod +x /usr/local/bin/net-apply.sh
About ipv6.method disabled: This only affects the Pi's own IPv6 address. Your Wi-Fi clients still receive IPv6 from your router, because a bridge operates at layer 2 and passes router advertisements straight through.
Raspberry Pi 3 adjustment
The Pi 3 has no 5 GHz radio. In the script above, find the block that starts with nmcli connection add type wifi and change two lines inside it.
Find these two lines:
  802-11-wireless.band a \
  802-11-wireless.channel 36 \
Replace them with this single line:
802-11-wireless.band bg \
Two lines become one. The block then looks like this:
nmcli connection add type wifi con-name br0-ap ifname "$WLAN_IF" master br0 \
  ssid "$WIFI_SSID" \
  802-11-wireless.mode ap \
  802-11-wireless.band bg \
  802-11-wireless.powersave 2 \
  wifi-sec.key-mgmt wpa-psk \
  wifi-sec.proto rsn \
  wifi-sec.pairwise ccmp \
  wifi-sec.group ccmp \
  wifi-sec.pmf 2 \
  wifi-sec.psk "$WIFI_PASS"
With no channel specified, the driver picks one itself. To pin it, add 802-11-wireless.channel 1 \ after the band line — on 2.4 GHz only channels 1, 6, and 11 are worth using, because all the others overlap with their neighbours.
While editing, watch the backslash at the end of each line: it joins the lines into a single command. Only the last line of the block (wifi-sec.psk) has none.
Step 4: Run it
sudo systemd-run --unit=net-apply /usr/local/bin/net-apply.sh
systemd-run starts the script detached from your SSH session, so it runs to completion even when the connection drops along the way.
Your SSH connection will now drop. Wait about a minute, then reconnect using the new IP address:
ssh user@192.168.1.50
Step 5: Verify
Are both interfaces in the bridge? Both the Ethernet and the Wi-Fi interface must be listed:
bridge link
Does the bridge carry the IP?
ip -4 addr show br0
Is the radio running in AP mode? Expected: type AP and the channel you configured:
iw dev wlan0 info
If something is missing, the log of the setup run tells you why:
journalctl -u net-apply --no-pager
Now test with a client. Connect a phone or laptop to the new Wi-Fi network. Here is the test that matters: the assigned IP must come from your LAN's address range — the same range your wired devices use. If the client gets an address from a completely different range, the bridge is not active and NAT is still happening somewhere.
Then reach a device on the LAN by its IP — opening your router's web interface in a browser works well. If that succeeds, the bridge is done.
Finally, reboot once. NetworkManager connections are stored persistently, so the access point comes back on its own. Check it anyway — better to find out now than in three weeks:
sudo reboot
Throughput
Inspect the negotiated rate of a connected client:
iw dev wlan0 station dump | grep -E 'tx bitrate|rx bitrate|signal'
Realistic expectations for the built-in radio (single antenna, 1×1, on the SDIO bus):
| Band | Real-world throughput |
|---|---|
| 2.4 GHz | 25–35 Mbit/s |
| 5 GHz, channel 36 | 60–100 Mbit/s |
The hardware has no more to give. The Pi's radio is a client chip playing access point, not a device built for the job. Throughput drops further with several clients active at once.
If you need more, a dedicated access point (from around €30) is the right answer: 300–600 Mbit/s and a dozen clients without complaint.
When measuring with iperf3, do not test against the Pi itself — you would be measuring its CPU and the SDIO bus alongside the actual radio link. Use another machine on the LAN as the endpoint.
Switching to 2.4 GHz, if 5 GHz does not reach far enough — it passes through walls less well:
sudo nmcli connection modify br0-ap 802-11-wireless.band bg 802-11-wireless.channel 0
sudo nmcli connection up br0-ap
This carries little risk: only the Wi-Fi drops briefly. The wired connection and your SSH session hang off the bridge and stay up.
Switching back to 5 GHz:
sudo nmcli connection modify br0-ap 802-11-wireless.band a 802-11-wireless.channel 36
sudo nmcli connection up br0-ap
Troubleshooting
bridge link shows only the Ethernet interface
NetworkManager did not attach the Wi-Fi to the bridge. The reason is usually in the log:
journalctl -u NetworkManager -n 100 --no-pager
Most often it is a missing country code or a channel that is not permitted.
Clients connect but get no IP address
The bridge is up, but DHCP requests are not reaching your router. Check that the Ethernet interface really is part of the bridge and that the cable link to the router is active.
The Wi-Fi network is not visible
iw dev wlan0 info
If it does not say type AP, the access point never started. Check the country code, and check whether the Wi-Fi interface is still connected as a client to some other network.
Reverting
To return to the original configuration:
sudo nmcli connection delete br0 br0-eth0 br0-ap
sudo nmcli connection modify "Wired connection 1" connection.autoconnect yes
sudo reboot
If your wired connection has a different name, use the same name here that you found in Step 2 and entered as OLD_CON in the script.
Note that the old connection obtains its IP the way it was originally configured. If it used DHCP, the Pi will be reachable at a different address than it was during bridged operation.
Conclusion
The Pi is now a transparent access point. As far as your network is concerned, there is no longer any difference between wired and wireless devices: the same addressing, the same name resolution, mutual reachability without detours.
The limiting factor remains the radio. For a handful of mobile devices browsing the web and reaching services on your own network, it holds up well. For high-resolution streaming or many simultaneous users, a dedicated access point is the better choice.
Comments
No comments yet — be the first!